1994 XJ Heat Not Blowing – Diagnose and Fix
XJ Heat Not Blowing? Mine wasn’t either . . .
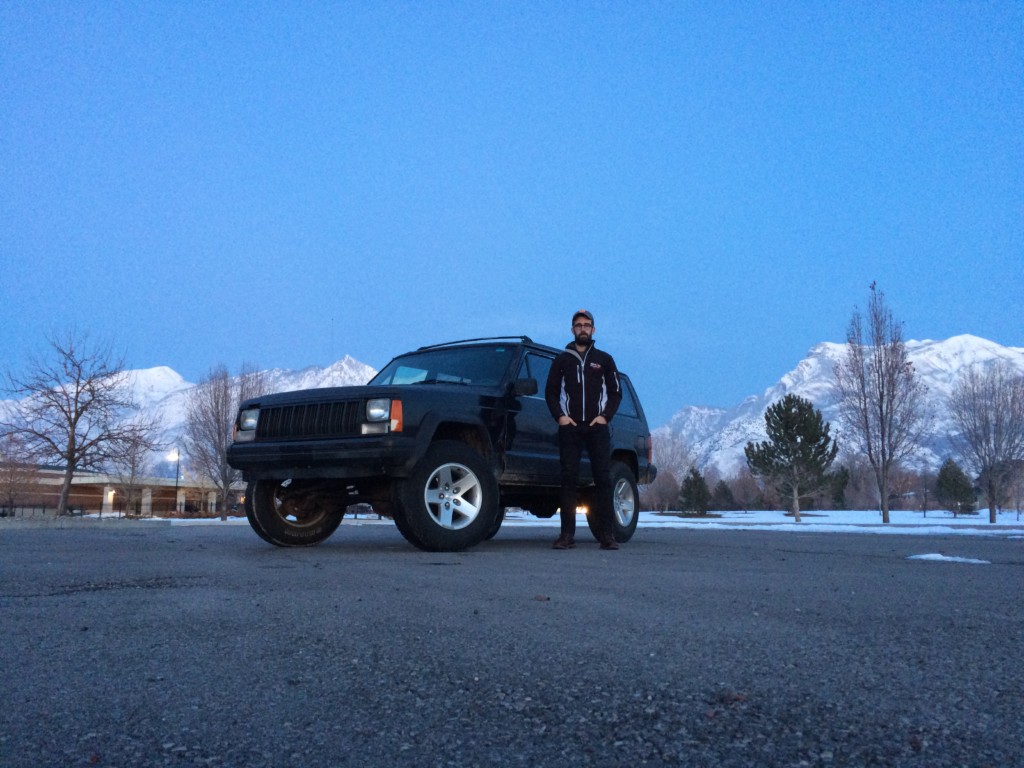
A year ago I bought a Jeep. She’s a 1994 Cherokee Sport (XJ) and my build thread starts here.
I call her Rigby.
A few weeks ago the heat went out. Yeah, in the middle of January. Same time I had a cold.
#perfectiming for an XJ heat not blowing problem to kick in.
I did what I do whenever something happens to her: jump on the Google and the Jeep forums to diagnose what could be the matter, watch a bunch of YouTube videos and decide whether I have the parts, tools and guts to go for it.
First choice: swap the motor that blows air through the cabin and the resistor that allows the motor to blow at different speeds.
Did that . . .
And I seemed to get a LITTLE bit of air blowing, but nothing happened when I flipped the switch on the dash.
So I kept researching all forms of “xj heat not blowing” to diagnose the problem, find tests to run and spec out possible solutions.
Lots of people in the forums say the Blower Switches on the dash — the wheel you use to select low, medium high — are prone to melt. So prone to melt, in fact, that people who check XJs in junk yards for their switches say that typically 4 out of 5 switches are toast.
Fine then. Replace the switch is up next.
After doing the motor and resistor, it seemed it would be the last step.
I removed the dash and sure enough the switch was fried. That for sure would cause the classic XJ heat not blowing problem.
Like so many XJ’s before mine, another melted switch:
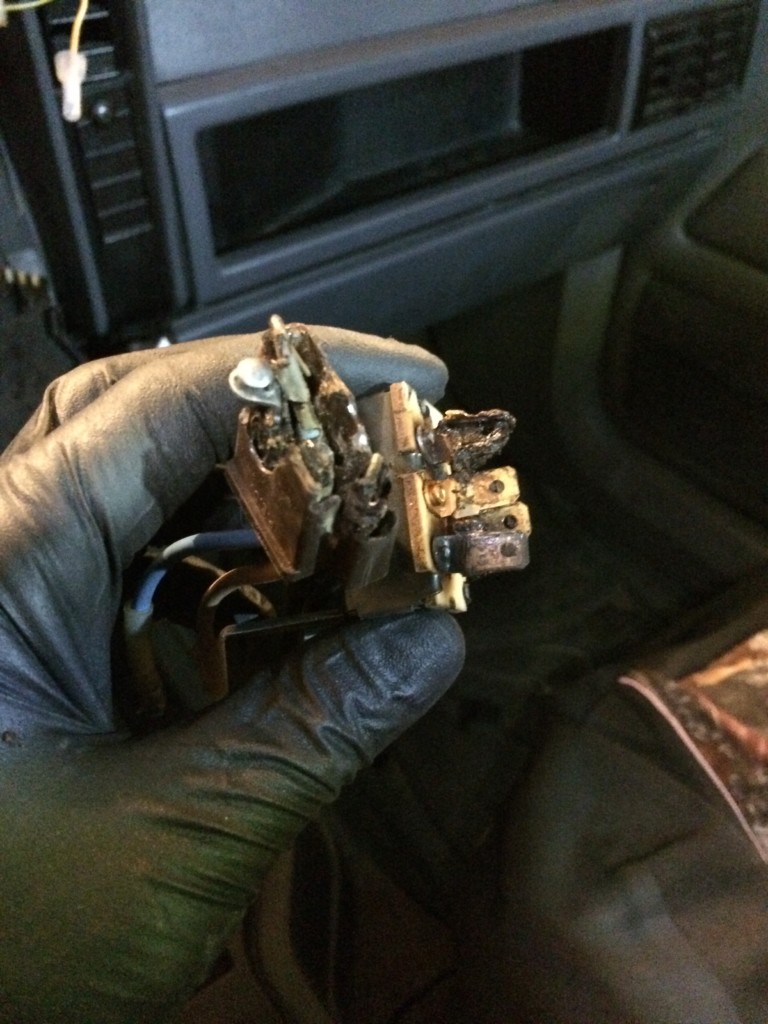
The part nearer my wrist is a plastic housing that’s supposed to have 4 female metal clips that slide nicely over the copper male posts of the Blower Switch, between my fingers.
I look closer and noticed my fried switch wasn’t the original . . . it’s at least the first replacement . . . the 4 wires coming off the switch are spliced into the wiring harness. I assume the original would have been wired right in. So not only did I have the XJ heat not blowing problem, one or more of Rigby’s previous owners had the XJ heat not blowing problem too.
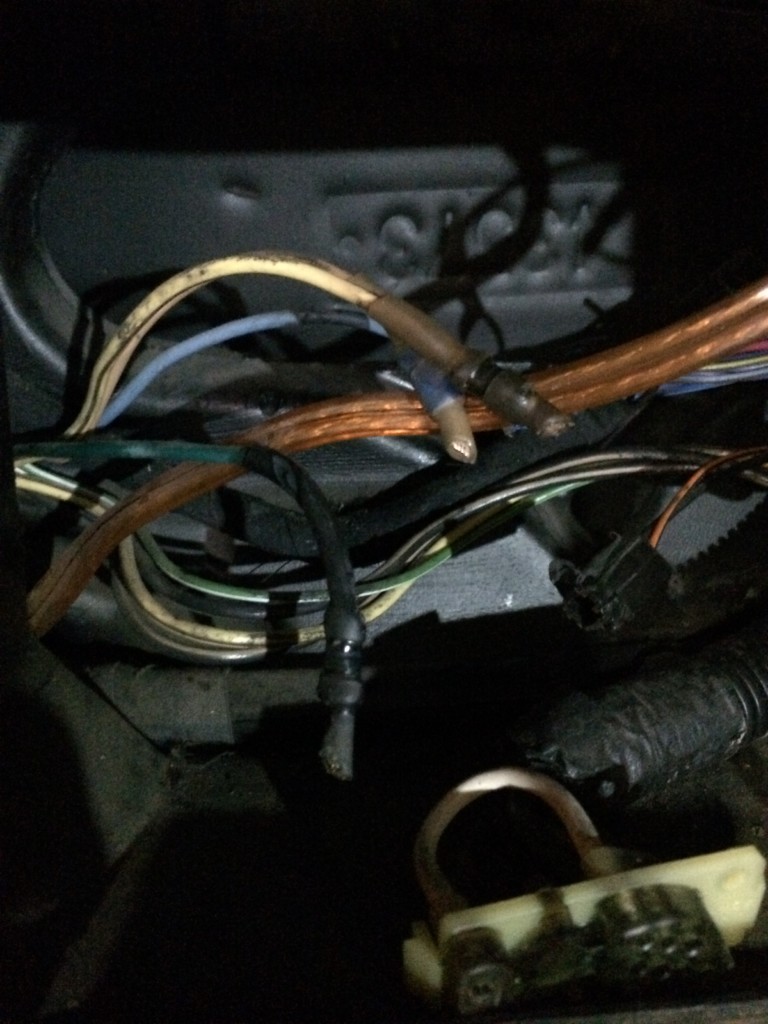
When I first took the old switch out, I clipped in front of the splices, which you can see here.
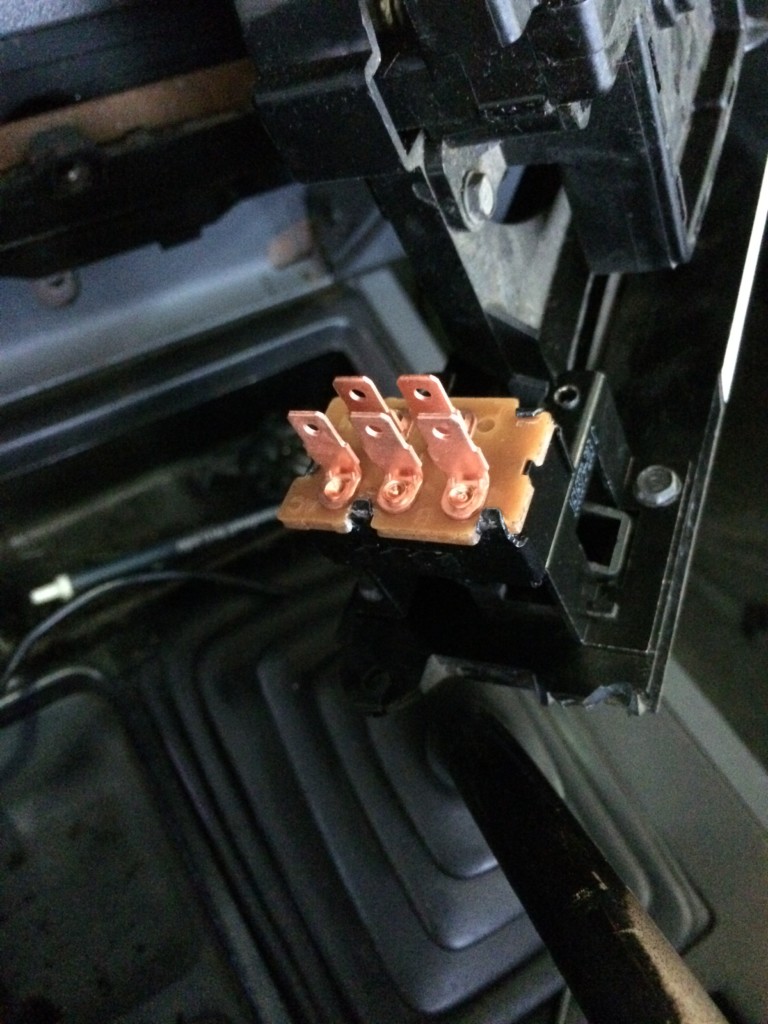
Getting the new switch attached to the back of the heat/ac plate that you see on the dash was easy. Two simple screws.
The new posts look so good compared to the old ones.
I got the switch from my local O’Reilly’s. I didn’t think about wiring when I got it, so after getting the new one on I went back to see about a replacement for the wires + wire clips + plastic housing to fit over those posts. We didn’t fit the original setup in stock, nor did it appear in the system for order. Seems no one makes them anymore … well someone ought to make a kit given how often the switches melt.
Either way, no problem.
My O’Reilly man Ben, who also drives an XJ, says “Get wires with the right-size clips, plug them right on and seal it up with grease. The plastic would melt again anyway.”
He finds a relay plug + wires for some other application and removes the wires from the plastic housing, and that’s what I buy, along with a wire stripper and a pack of butt splice connectors (how to video) to splice my new wires into Rigby’s wiring harness.
UPDATE: There are kits. Here’s one and it comes with the resistor. The harness is for the resistor specifically, but I’m pretty sure it will work on the switch. Either way … since the plastic is prone to melt again, my suggestion is to get a relay plug, pop the wires out of the plastic housing, connect them directly to the switch terminals, and plug the connections with dieletric grease. The grease isn’t going to melt. The plastic probably will. Again. Here’s a 2-pack of the plug.

I trim the old splices off and splice all the new wires in. Strip about 1/8″ of wiring insulation from harness end and plug end, feed both into the butt splice connector, crimp the connector and wires together, and heat it up with a lighter until the blue material shrinks, sealing both ends.
This was my first time doing any electrical work, so we’ll see how everything holds up.
You can see the finished splices of the yellow and green wires below, along with the clip for the yellow wire without a plastic housing to sit in. Each of those clips went right onto the new switch posts.
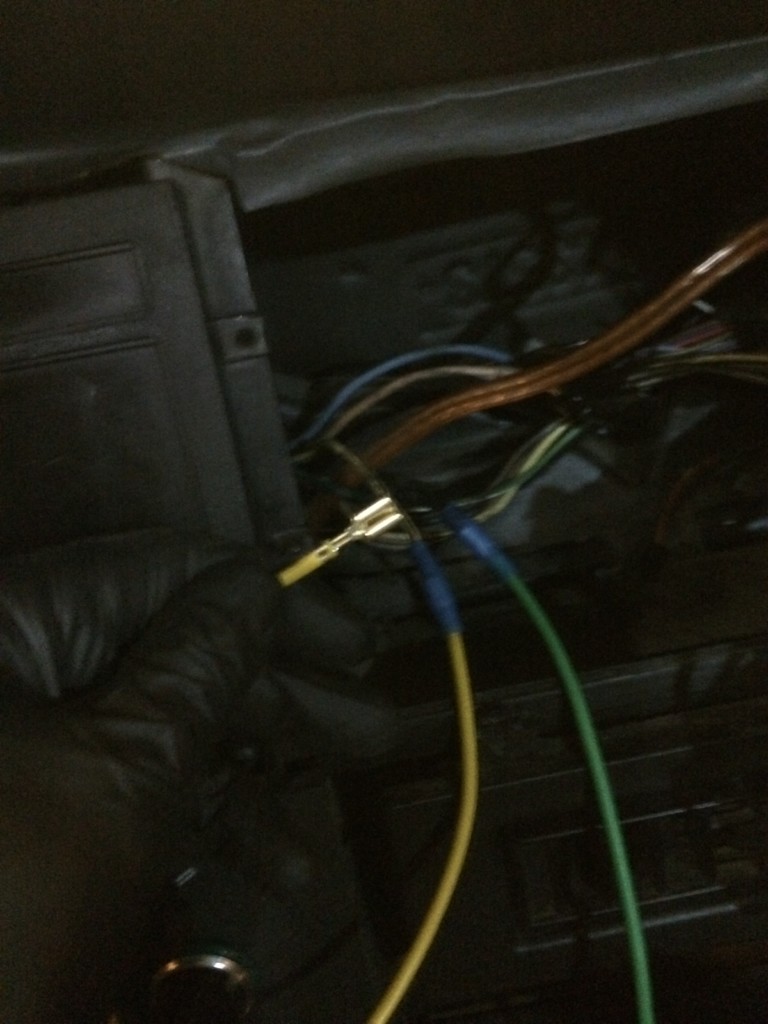
With the four new wires spliced in, I coated the clips with silicon grease and slid all 4 onto their proper posts, then gobbed a lot more grease to coat the posts and clips entirely.
The grease will help dissipate heat and will protect the connections from moisture, dust and other interferences.
I have no idea what the heat thresholds are for that grease . . . will it liquify and drip off? Maybe, I’ll check how it looks the next time I run the fan on high for awhile. I have no idea at what temp it smokes/burns, but I assume it won’t because this is the same grease that you squirt into your distributor and spark plug wire connectors. Any fire hazard there would be no bueno.
UPDATE: Nov 2017 — grease hasn’t melted away, all is good.
Did I take my XJ heat not blowing problem and turn it around?
Have a look:
If the video doesn’t load, watch it here.
NOW . . .
What I found after replacing the fan and resistor that would have helped me properly diagnose, from the beginning, that my XJ heat not blowing problem resided in my switch, had I studied it closely:
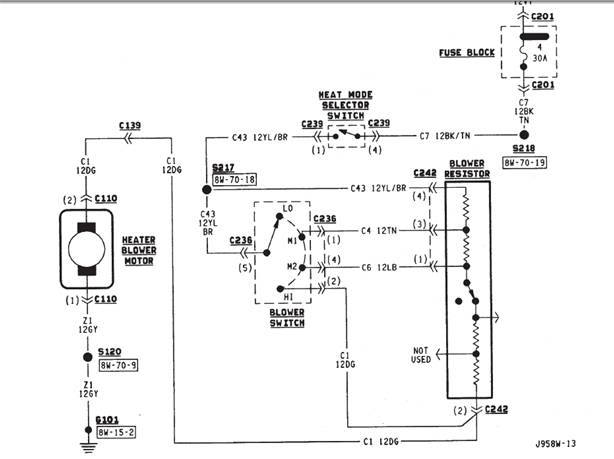
The Pre-97 XJ Heater Blower Motor Wiring Diagram
Word to the wise.
Whenever dealing with diagnosing anything electrical, FIND THE WIRING DIAGRAM.
The diagram reveals the circuit logic which you can follow to pinpoint where the circuits are breaking.
Which is smarter than replacing everything in the entire circuit.
In this case, that wasn’t costly. In other cases, why pay to replace something that’s working?
And so now I present . . .
XJ Heat Not Blowing and Other Problems: How to Diagnose in a Pre-97 XJ
Take your car to a quiet place so you can hear things turning on and off without the distraction of road noise.
[1] When you switch the Climate Mode Selector (the top sliding bar, above temperature, on your dash) from “OFF” to ANY of the Vent/Heat/Defrost options AND the Blower Switch (the wheel) is at THE BOTTOM (low), do you hear a fan start and can you, in at least one of those options, feel any air blowing out of any of the vents?
[A] If you hear no fan and have no air blowing from any vent on any option, either your Climate Mode Selector Switch is busted, your fuse is blown, or the Blower Motor is out. Check the fuse first, that’s easy to replace. If the fuse is fine, pull the plug to your blower motor, run power to it and see if it works; if battery power doesn’t make it turn, replace the motor. If the fuse and motor are fine, it’s your Mode Selector and for that it’s probably easiest to pull an entire climate control unit from an old XJ that to fix just the one slider.
[B] If you DO hear a fan turn on and can feel air blowing from at least one vent on at least one option, go to [2]
[2] In Vent, Heat or Defrost, move your Blower Switch (the wheel on the left) from bottom to top. There are 4 modes. If you can’t feel all 4 click, your switch has at least a mechanical failure. You may also have an electrical failure. As you go through the 4 modes, listen for changes in fan speed.
[A] LOW only :: your switch is busted. Look at the diagram. There is a line that runs from the Climate Mode Selector directly to the resistor. This is “low.” So even if your switch is busted, your fan (when heat is turned on), will turn on low.
[B] HIGH only :: your resistor is busted. Look at the diagram. There is a line that runs from the Blower Switch directly to the blower motor. So even if your resistor is busted, your blower motor will work on High when you move the Blower Switch to High and complete the circuit.
[C] ALL FOUR MODES WORK :: you’re good, duh. Why are you reading this?
[D] OTHER COMBOS
NO LOW :: at least the “low” resistor coil is gone
NO M1 :: either the M1 switch wiring is out, or the M1 resistor coil is out, or both
NO M2 :: either the M2 switch wiring is out, or the M2 resistor coil is out, or both
If any of the resistor coils are or could be out, replace the resistor and retest.
If LOW doesn’t work after a new resistor . . . it shouldn’t be working at all. Must be a fault in the wiring that runs directly from S217 to C242 (the resistor).
If M1 doesn’t work after a new resistor . . . replace the Blower Switch. No reason to do part of it, just change the whole thing.
If M2 doesn’t work after a new resistor . . . replace the Blower Switch. No reason to do part of it, just change the whole thing.
If your blower motor works, and you change the resistor and the Blower Switch . . . and you STILL have a mode that doesn’t work:
Then your problem is a fault in the wiring for that mode. That’s over my pay grade. Good luck!
TL;DR :: the way I see it
The resistor is cheap (about $30), the Blower Switch with the copper posts that attaches to the back of the Climate Plate is cheap too (less than $30). Accessing either requires removing the dash. Since the Blower Switch is more prone to failure (melting) but the resistor is easier to replace, then I say that if all this has you suspect EITHER, just REPLACE BOTH. One trip to the auto parts store. One time to open your dash. Refresh pieces of a coordinating electrical system together for even wear. Etc. Annnnnd unless you know the age of your blower motor, do that too. It’s like $40.
Note: when you buy the Blower Switch, also buy just about any 5-wire relay plug for $10 that has the same size clips. Pop the clips out of the plastic. You only need 4. Also get a box of butt splice connectors (less than $5, get more than 4 because you’ll probably mess up at least 1) and use those to splice into your harness and connect to the Switch.
With the 5th wire from the relay plug, use that to ground your blower motor. Strip a little insulation from the open end and feed that into one of the screw that holds the blower motor against the firewall. Then drill a small hole in the clip and into an unpainted piece of metal on the body. Attach the clip to the body with a small screw.
“OK, Nat. So I’ve done all that and now my ‘XJ heat not blowing’ problem is a ‘XJ heat NOT hot’ problem . . .”
Cool. This is what I’m gonna try soon to see if my heat will get hot faster:
Backwards flush the heater core.
The heater core looks like a radiator, but it’s buried way the freak between the firewall and the dash and apparently is a beast to get to. So replacing them is a J-O-B.
But before replacing, a backwards flush may do the trick to loosen up, blow out or release whatever is slowing or stopping coolant from running back there. When the coolant doesn’t flow, then you have just cold or lukewarm coolant trying to heat up the air getting blown over the heater core and out your vents.
Here’s the coolant flow diagram for AMC’s trusty high-output (HO) 4.0L straight-6:
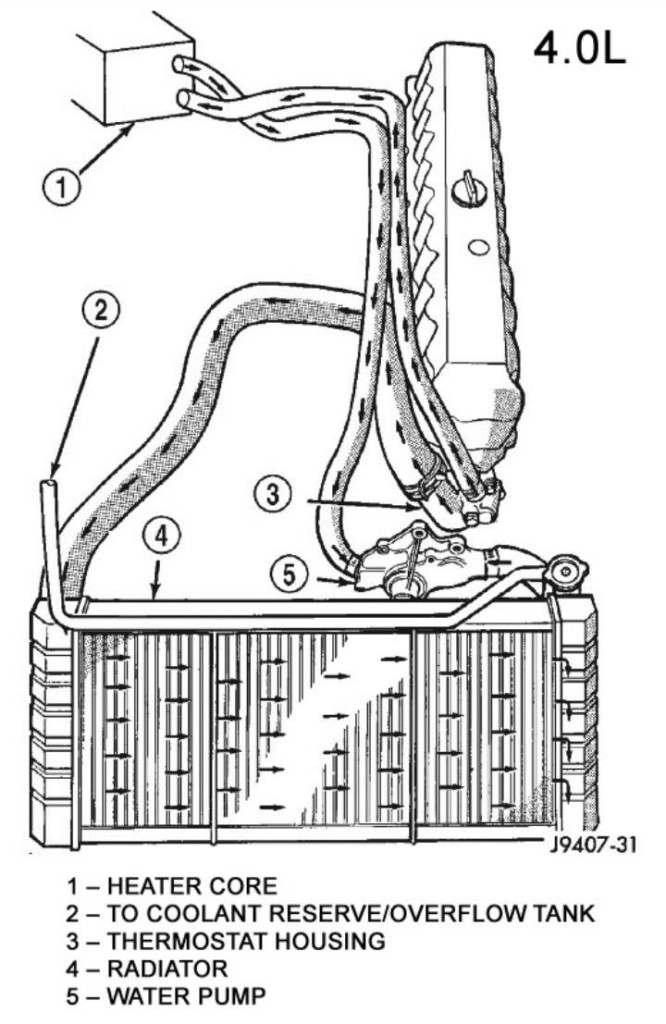
How to do a backwards flush of the 4.0’s heater core:
Remove the skinny hose from the thermostat housing (flows into the heater core) and feed that into an empty container large enough to catch a bunch of coolant. Say 2+ gallons. 5 would be great.
Then remove the skinny hose from the passenger side of the water pump (flows out of the heater core), and take a garden hose with a nozzle, shove the nozzle into that outflow hose and turn the pressure up to force fresh water into the heater core in the reverse direction it normal flows. The water you spray in will then travel the reverse path through the core, out the inflow hose, and drain into your empty container.
Keep the water on until the exiting water looks clear or you fill your container.
Let the plain water drain out of the hoses.
Reattach the hoses.
Refill your radiator with coolant
Start the engine.
Get hot air faster (fingers crossed).
If there’s no change and your air stays cool even after the engine is fully warm, you’ll probably need to replace the heater core. Have fun with that.
#
This is #xjlife.
Really happy to own Rigby. Learning a lot . . . from how to fix XJ heat not blowing to cleaning my differentials to replacing a fuel pump AND perhaps most importantly: that the more I nurse something back to her best, the more endeared to her I am.